Much of this article has been taken from the github of Japanese Katsuya Hyodo (PINTO0309). If you would like to visit his GitHub, see https://github.com/PINTO0309/mediapipe-bin.
The performance comparison of Raspberry Pi OS 32-bit and 64-bit is taken from https://qiita.com/terryky/items/243000fcfcb89af11510.
It's been a while since I've written an article about Raspberry Pi. Most of the articles were about NVidia Jetson, but this article is about Raspberry Pi. This topic is Google's Media Pipe. Mediapipe is not very dependent on the GPU. And in particular, there is absolutely no dependency on NVidia's CUDA. The reason is that Mediapipe is a framework designed with Android or Apple's IOS installed on smartphones running smoothly in mind.
Mediapipe is a fairly attractive AI framework. It is difficult for general AI frameworks to perform well in SBC (Single Board Computer) without NVIdia CPU like Raspberry Pi. However, as explained in this article, Mediapipe performs quite well on Raspberry Pi. Considering that Mediapipe was created with a mobile environment such as Android in mind, it is also a reasonable result.
Have you ever seen a smartphone with NVidia GPU and CUDA libraries installed? I don't remember seeing it.
Android mostly uses the OpenGL graphics accelerator. OpenGL is a general-purpose graphics acceleration engine that can be used in various operating systems and supports ARM's Mali CPU, which is used in many smartphones. Therefore, it is natural that Google's MediaPipe supports general-purpose OpenGL instead of CUDA.
As always, I will find a way to run MediaPipe using Python. This article does not cover C/C++ example code building using bazel.
Preparing the Raspberry Pi
I'm going to use Raspberry Pi 4B model with 8GB Memory. Perhaps 4GB model might work well. And I'm going to install the 64bit Raspberry Pi OS. So download the image and prepare an SD card.
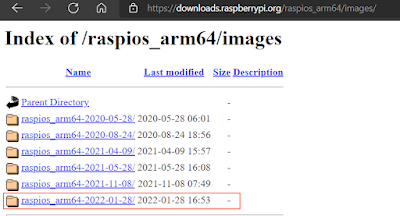
Download the 64bit Image from Raspberry Pi Foundation
You can download the official BullsEye 64bit Raspberry Pi image from https://downloads.raspberrypi.org/raspios_arm64/images/ or you can burn an image using "Raspberry Pi Imager".
After downloading the image, use Etcher or Raspberry Pi Imager to make a bootable SD card. This article does not explain the initial tasks such as language and time zone settings.
Install Required packages
Follow these steps.
Install Pre required packages
root@raspberrypi:~# apt-get update
root@raspberrypi:~# apt-get install python3-dev python3-pip cmake git protobuf-compiler openjdk-11-jdk-headless
root@raspberrypi:~# apt-get install mesa-common-dev libegl1-mesa-dev libgles2-mesa-dev -y
root@raspberrypi:~# pip3 install pip setuptools --upgrade
Install Bazel
root@raspberrypi:~# cd /usr/local/src
root@raspberrypi:/usr/local/src# wget https://github.com/PINTO0309/Bazel_bin/raw/main/3.7.2/aarch64/install.sh
root@raspberrypi:/usr/local/src# chmod +x install.sh
root@raspberrypi:/usr/local/src# ./install.sh
Install MediaPipe from Github
root@raspberrypi:/usr/local/src# cd /usr/local/src
root@raspberrypi:/usr/local/src# git clone https://github.com/google/mediapipe.git
root@raspberrypi:/usr/local/src# cd mediapipe

root@raspberrypi:/usr/local/src/mediapipe# sed -i -e "/\"imgcodecs\"/d;/\"calib3d\"/d;/\"features2d\"/d;/\"highgui\"/d;/\"video\"/d;/\"videoio\"/d" third_party/BUILD
root@raspberrypi:/usr/local/src/mediapipe# sed -i -e "/-ljpeg/d;/-lpng/d;/-ltiff/d;/-lImath/d;/-lIlmImf/d;/-lHalf/d;/-lIex/d;/-lIlmThread/d;/-lrt/d;/-ldc1394/d;/-lavcodec/d;/-lavformat/d;/-lavutil/d;/-lswscale/d;/-lavresample/d" third_party/BUILD
root@raspberrypi:/usr/local/src/mediapipe# sed -i -e "/^        # Optimization flags/i \        \"ENABLE_NEON\": \"OFF\"," third_party/BUILD
root@raspberrypi:/usr/local/src/mediapipe# sed -i -e "/^        # Optimization flags/i \        \"WITH_TENGINE\": \"OFF\"," third_party/BUILD
Install OpenCV
If you are using BullsEys 64 bit version, modify as follows so that OpenCV uses GStreamer.
cmake .. -DCMAKE_BUILD_TYPE=RELEASE -DCMAKE_INSTALL_PREFIX=/usr/local \ -DBUILD_TESTS=OFF -DBUILD_PERF_TESTS=OFF -DBUILD_opencv_ts=OFF \ -DOPENCV_EXTRA_MODULES_PATH=/tmp/build_opencv/opencv_contrib/modules \ -DBUILD_opencv_aruco=OFF -DBUILD_opencv_bgsegm=OFF -DBUILD_opencv_bioinspired=OFF \ -DBUILD_opencv_ccalib=OFF -DBUILD_opencv_datasets=OFF -DBUILD_opencv_dnn=OFF \ -DBUILD_opencv_dnn_objdetect=OFF -DBUILD_opencv_dpm=OFF -DBUILD_opencv_face=OFF \ -DBUILD_opencv_fuzzy=OFF -DBUILD_opencv_hfs=OFF -DBUILD_opencv_img_hash=OFF \ -DBUILD_opencv_js=OFF -DBUILD_opencv_line_descriptor=OFF -DBUILD_opencv_phase_unwrapping=OFF \ -DBUILD_opencv_plot=OFF -DBUILD_opencv_quality=OFF -DBUILD_opencv_reg=OFF \ -DBUILD_opencv_rgbd=OFF -DBUILD_opencv_saliency=OFF -DBUILD_opencv_shape=OFF \ -DBUILD_opencv_structured_light=OFF -DBUILD_opencv_surface_matching=OFF \ -DBUILD_opencv_world=OFF -DBUILD_opencv_xobjdetect=OFF -DBUILD_opencv_xphoto=OFF \ -DCV_ENABLE_INTRINSICS=ON -DWITH_EIGEN=ON -DWITH_PTHREADS=ON -DWITH_PTHREADS_PF=ON \-DWITH_GSTREAMER=ON \-DWITH_JPEG=ON -DWITH_PNG=ON -DWITH_TIFF=ON
In BullsEye, camera control has been moved from the Legacy stack to the libcamera stack. Therefore, the camera functions of OpenCV do not work. You must use GStreamer's pipeline to use the camera. More details are explained at https://spyjetson.blogspot.com/2022/03/opencv-camera-control-on-raspberry-pi.html .
It takes tens of minutes to build the OpenCV, take a coffee break time.
root@raspberrypi:/usr/local/src/mediapipe# chmod +x setup_opencv.sh
root@raspberrypi:/usr/local/src/mediapipe# ./setup_opencv.sh
Build MediaPipe Python Packages
Now the last step. It also takes tens of minutes to build the MediaPipe, take another coffee break time.
root@raspberrypi:/usr/local/src/mediapipe# python3 setup.py gen_protos
root@raspberrypi:/usr/local/src/mediapipe# bazel clean --expunge
root@raspberrypi:/usr/local/src/mediapipe# python3 setup.py bdist_wheel
If the build is completed successfully without an error, you can see that the whl file is created in the dist directory. This file is a Python package that can be installed with the pip3 command.
root@raspberrypi:/usr/local/src/mediapipe# ls -al dist
total 36792
drwxr-xr-x  2 root root     4096 Jun 12 01:28 .
drwxr-xr-x 10 root root     4096 Jun 12 10:59 ..
-rw-r--r--  1 root root 37663260 Jun 12 10:59 mediapipe-0.8-cp37-cp37m-linux_aarch64.whl
Install MediaPipe whl file
Now install the whl file using pip3 command.
root@raspberrypi:/usr/local/src/mediapipe# pip3 install dist/mediapipe-0.8-cp37-cp37m-linux_aarch64.whl
Looking in indexes: https://pypi.org/simple, https://www.piwheels.org/simple
Processing ./dist/mediapipe-0.8-cp37-cp37m-linux_aarch64.whl
Requirement already satisfied: numpy in /usr/lib/python3/dist-packages (from mediapipe==0.8) (1.16.2)
Collecting attrs>=19.1.0
  Downloading https://www.piwheels.org/simple/attrs/attrs-21.2.0-py2.py3-none-any.whl (53 kB)
     |████████████████████████████████| 53 kB 98 kB/s
Collecting opencv-contrib-python
  Downloading opencv_contrib_python-4.5.2.54-cp37-cp37m-manylinux2014_aarch64.whl (40.8 MB)
     |████████████████████████████████| 40.8 MB 15 kB/s
Requirement already satisfied: six in /usr/lib/python3/dist-packages (from mediapipe==0.8) (1.12.0)
Collecting protobuf>=3.11.4
  Downloading protobuf-3.17.3-cp37-cp37m-manylinux2014_aarch64.whl (922 kB)
     |████████████████████████████████| 922 kB 13.2 MB/s
Collecting absl-py
  Downloading https://www.piwheels.org/simple/absl-py/absl_py-0.12.0-py3-none-any.whl (129 kB)
     |████████████████████████████████| 129 kB 140 kB/s
Requirement already satisfied: wheel in /usr/lib/python3/dist-packages (from mediapipe==0.8) (0.32.3)
Collecting numpy
  Downloading numpy-1.20.3-cp37-cp37m-manylinux_2_17_aarch64.manylinux2014_aarch64.whl (12.7 MB)
     |████████████████████████████████| 12.7 MB 14 kB/s
Installing collected packages: numpy, protobuf, opencv-contrib-python, attrs, absl-py, mediapipe
  Attempting uninstall: numpy
    Found existing installation: numpy 1.16.2
    Uninstalling numpy-1.16.2:
      Successfully uninstalled numpy-1.16.2
Successfully installed absl-py-0.12.0 attrs-21.2.0 mediapipe-0.8 numpy-1.20.3 opencv-contrib-python-4.5.2.54 protobuf-3.17.3
WARNING: Running pip as root will break packages and permissions. You should install packages reliably by using venv: https://pip.pypa.io/warnings/venv
Let's check if MediaPipe is working properly.
root@raspberrypi:/usr/local/src/mediapipe# python3
Python 3.7.3 (default, Jan 22 2021, 20:04:44)
[GCC 8.3.0] on linux
Type "help", "copyright", "credits" or "license" for more information.
>>> import mediapipe as mp
>>> import cv2
>>> cv2.__version__
'4.5.2'
Yes, it seems to be working fine. Let's check the performance using a simple example python example.
Performance of MediaPipe on the Rpi Test
I made a simple python script that detects face mesh and displays FPS values on the screen. And I used Logitec Webcam
Face Mesh Detecction example
#https://dev.classmethod.jp/articles/mediapipe-extract-data-from-multi-hand-tracking/
import cv2
import sys, time
import mediapipe as mp
mp_drawing = mp.solutions.drawing_utils
mp_face_mesh = mp.solutions.face_mesh

# For static images:

drawing_spec = mp_drawing.DrawingSpec(thickness=1, circle_radius=1)
face_mesh = mp_face_mesh.FaceMesh(static_image_mode=True, max_num_faces=1, min_detection_confidence=0.5)

def get_face_mesh(image):
    results = face_mesh.process(cv2.cvtColor(image, cv2.COLOR_BGR2RGB))

    # Print and draw face mesh landmarks on the image.
    if not results.multi_face_landmarks:
        return image
    annotated_image = image.copy()
    for face_landmarks in results.multi_face_landmarks:
        #print(' face_landmarks:', face_landmarks)
        mp_drawing.draw_landmarks(
            image=annotated_image,
            landmark_list=face_landmarks,
            connections=mp_face_mesh.FACE_CONNECTIONS,
            landmark_drawing_spec=drawing_spec,
            connection_drawing_spec=drawing_spec)
        #print('%d facemesh_landmarks'%len(face_landmarks.landmark))
    return annotated_image


font = cv2.FONT_HERSHEY_SIMPLEX
cap = cv2.VideoCapture(0)
if (cap.isOpened() == False):
  print("Unable to read camera feed")

cap.set(cv2.CAP_PROP_FRAME_WIDTH, 640)
cap.set(cv2.CAP_PROP_FRAME_HEIGHT, 480)
while cap.isOpened():
    s = time.time()
    ret, img = cap.read()
    if ret == False:
        print('WebCAM Read Error')
        sys.exit(0)

    annotated = get_face_mesh(img)
    e = time.time()
    fps = 1 / (e - s)
    cv2.putText(annotated, 'FPS:%5.2f'%(fps), (10,50), font, fontScale = 1,  color = (0,255,0), thickness = 1)
    cv2.imshow('webcam', annotated)
    key = cv2.waitKey(1)
    if key == 27:   #ESC
        break

cap.release()
<mp_video_perf.py>
Now run the code.
root@raspberrypi:/usr/local/src/example# python3 mp_video_perf.py
WARNING: Logging before InitGoogleLogging() is written to STDERR
W20210612 12:13:16.508558  2235 tflite_model_loader.cc:32] Trying to resolve path manually as GetResourceContents failed: ; Can't find file: mediapipe/modules/face_detection/face_detection_front.tflite
INFO: Created TensorFlow Lite XNNPACK delegate for CPU.
W20210612 12:13:16.515974  2234 tflite_model_loader.cc:32] Trying to resolve path manually as GetResourceContents failed: ; Can't find file: mediapipe/modules/face_landmark/face_landmark.tfliteIf successful, you can see the screen like this.

The FPS value was approximately between 9 and 13. It has been quite successful to achieve this level of performance on a Raspberry Pi without the help of a GPU.
Hand Detection
This time, let's test hand detection.
#!/usr/bin/env python
# -*- coding: utf-8 -*-
'''
Original source code from : https://github.com/Kazuhito00/mediapipe-python-sample
'''
import copy, time
import argparse

import cv2 as cv
import numpy as np
import mediapipe as mp


def main():

    cap = cv.VideoCapture(0)
    cap.set(cv.CAP_PROP_FRAME_WIDTH, 640)
    cap.set(cv.CAP_PROP_FRAME_HEIGHT, 480)

    mp_hands = mp.solutions.hands
    hands = mp_hands.Hands(
        max_num_hands=2,
        min_detection_confidence=0.5,
        min_tracking_confidence=0.5,
    )

    while True:
        s = time.time()
        ret, image = cap.read()
        if not ret:
            break
        image = cv.flip(image, 1)
        debug_image = copy.deepcopy(image)

        image = cv.cvtColor(image, cv.COLOR_BGR2RGB)
        results = hands.process(image)

        if results.multi_hand_landmarks is not None:
            for hand_landmarks, handedness in zip(results.multi_hand_landmarks,
                                                  results.multi_handedness):
                cx, cy = calc_palm_moment(debug_image, hand_landmarks)
                brect = calc_bounding_rect(debug_image, hand_landmarks)
                debug_image = draw_landmarks(debug_image, cx, cy,
                                             hand_landmarks, handedness)
                debug_image = draw_bounding_rect(True, debug_image, brect)
        e = time.time()
        fps = 1 / (e - s)
        cv.putText(debug_image, "FPS:%04.3f"%(fps), (10, 30),
                   cv.FONT_HERSHEY_SIMPLEX, 1.0, (0, 255, 0), 2, cv.LINE_AA)

        key = cv.waitKey(1)
        if key == 27:  # ESC
            break

        cv.imshow('MediaPipe Hand Demo', debug_image)

    cap.release()
    cv.destroyAllWindows()


def calc_palm_moment(image, landmarks):
    image_width, image_height = image.shape[1], image.shape[0]

    palm_array = np.empty((0, 2), int)

    for index, landmark in enumerate(landmarks.landmark):
        landmark_x = min(int(landmark.x * image_width), image_width - 1)
        landmark_y = min(int(landmark.y * image_height), image_height - 1)

        landmark_point = [np.array((landmark_x, landmark_y))]

        if index == 0:
            palm_array = np.append(palm_array, landmark_point, axis=0)
        if index == 1:
            palm_array = np.append(palm_array, landmark_point, axis=0)
        if index == 5:
            palm_array = np.append(palm_array, landmark_point, axis=0)
        if index == 9:
            palm_array = np.append(palm_array, landmark_point, axis=0)
        if index == 13:
            palm_array = np.append(palm_array, landmark_point, axis=0)
        if index == 17:
            palm_array = np.append(palm_array, landmark_point, axis=0)
    M = cv.moments(palm_array)
    cx, cy = 0, 0
    if M['m00'] != 0:
        cx = int(M['m10'] / M['m00'])
        cy = int(M['m01'] / M['m00'])

    return cx, cy


def calc_bounding_rect(image, landmarks):
    image_width, image_height = image.shape[1], image.shape[0]

    landmark_array = np.empty((0, 2), int)

    for _, landmark in enumerate(landmarks.landmark):
        landmark_x = min(int(landmark.x * image_width), image_width - 1)
        landmark_y = min(int(landmark.y * image_height), image_height - 1)

        landmark_point = [np.array((landmark_x, landmark_y))]

        landmark_array = np.append(landmark_array, landmark_point, axis=0)

    x, y, w, h = cv.boundingRect(landmark_array)

    return [x, y, x + w, y + h]


def draw_landmarks(image, cx, cy, landmarks, handedness):
    image_width, image_height = image.shape[1], image.shape[0]

    landmark_point = []

    for index, landmark in enumerate(landmarks.landmark):
        if landmark.visibility < 0 or landmark.presence < 0:
            continue

        landmark_x = min(int(landmark.x * image_width), image_width - 1)
        landmark_y = min(int(landmark.y * image_height), image_height - 1)

        landmark_point.append((landmark_x, landmark_y))

        if index == 0:
            cv.circle(image, (landmark_x, landmark_y), 5, (0, 255, 0), 2)
        if index == 1:
            cv.circle(image, (landmark_x, landmark_y), 5, (0, 255, 0), 2)
        if index == 2:
            cv.circle(image, (landmark_x, landmark_y), 5, (0, 255, 0), 2)
        if index == 3:
            cv.circle(image, (landmark_x, landmark_y), 5, (0, 255, 0), 2)
        if index == 4:
            cv.circle(image, (landmark_x, landmark_y), 5, (0, 255, 0), 2)
            cv.circle(image, (landmark_x, landmark_y), 12, (0, 255, 0), 2)
        if index == 5:
            cv.circle(image, (landmark_x, landmark_y), 5, (0, 255, 0), 2)
        if index == 6:
            cv.circle(image, (landmark_x, landmark_y), 5, (0, 255, 0), 2)
        if index == 7:
            cv.circle(image, (landmark_x, landmark_y), 5, (0, 255, 0), 2)
        if index == 8:
            cv.circle(image, (landmark_x, landmark_y), 5, (0, 255, 0), 2)
            cv.circle(image, (landmark_x, landmark_y), 12, (0, 255, 0), 2)
        if index == 9:
            cv.circle(image, (landmark_x, landmark_y), 5, (0, 255, 0), 2)
        if index == 10:
            cv.circle(image, (landmark_x, landmark_y), 5, (0, 255, 0), 2)
        if index == 11:
            cv.circle(image, (landmark_x, landmark_y), 5, (0, 255, 0), 2)
        if index == 12:
            cv.circle(image, (landmark_x, landmark_y), 5, (0, 255, 0), 2)
            cv.circle(image, (landmark_x, landmark_y), 12, (0, 255, 0), 2)
        if index == 13:
            cv.circle(image, (landmark_x, landmark_y), 5, (0, 255, 0), 2)
        if index == 14:
            cv.circle(image, (landmark_x, landmark_y), 5, (0, 255, 0), 2)
        if index == 15:
            cv.circle(image, (landmark_x, landmark_y), 5, (0, 255, 0), 2)
        if index == 16:
            cv.circle(image, (landmark_x, landmark_y), 5, (0, 255, 0), 2)
            cv.circle(image, (landmark_x, landmark_y), 12, (0, 255, 0), 2)
        if index == 17:
            cv.circle(image, (landmark_x, landmark_y), 5, (0, 255, 0), 2)
        if index == 18:
            cv.circle(image, (landmark_x, landmark_y), 5, (0, 255, 0), 2)
        if index == 19:
            cv.circle(image, (landmark_x, landmark_y), 5, (0, 255, 0), 2)
        if index == 20:
            cv.circle(image, (landmark_x, landmark_y), 5, (0, 255, 0), 2)
            cv.circle(image, (landmark_x, landmark_y), 12, (0, 255, 0), 2)

    # lines
    if len(landmark_point) > 0:
        # thumb
        cv.line(image, landmark_point[2], landmark_point[3], (0, 255, 0), 2)
        cv.line(image, landmark_point[3], landmark_point[4], (0, 255, 0), 2)

        # index finger
        cv.line(image, landmark_point[5], landmark_point[6], (0, 255, 0), 2)
        cv.line(image, landmark_point[6], landmark_point[7], (0, 255, 0), 2)
        cv.line(image, landmark_point[7], landmark_point[8], (0, 255, 0), 2)

        # middle finger
        cv.line(image, landmark_point[9], landmark_point[10], (0, 255, 0), 2)
        cv.line(image, landmark_point[10], landmark_point[11], (0, 255, 0), 2)
        cv.line(image, landmark_point[11], landmark_point[12], (0, 255, 0), 2)

        # ring finger
        cv.line(image, landmark_point[13], landmark_point[14], (0, 255, 0), 2)
        cv.line(image, landmark_point[14], landmark_point[15], (0, 255, 0), 2)
        cv.line(image, landmark_point[15], landmark_point[16], (0, 255, 0), 2)

        # pinky
        cv.line(image, landmark_point[17], landmark_point[18], (0, 255, 0), 2)
        cv.line(image, landmark_point[18], landmark_point[19], (0, 255, 0), 2)
        cv.line(image, landmark_point[19], landmark_point[20], (0, 255, 0), 2)

        # palm
        cv.line(image, landmark_point[0], landmark_point[1], (0, 255, 0), 2)
        cv.line(image, landmark_point[1], landmark_point[2], (0, 255, 0), 2)
        cv.line(image, landmark_point[2], landmark_point[5], (0, 255, 0), 2)
        cv.line(image, landmark_point[5], landmark_point[9], (0, 255, 0), 2)
        cv.line(image, landmark_point[9], landmark_point[13], (0, 255, 0), 2)
        cv.line(image, landmark_point[13], landmark_point[17], (0, 255, 0), 2)
        cv.line(image, landmark_point[17], landmark_point[0], (0, 255, 0), 2)

    if len(landmark_point) > 0:
        # handedness.classification[0].index
        # handedness.classification[0].score

        cv.circle(image, (cx, cy), 12, (0, 255, 0), 2)
        cv.putText(image, handedness.classification[0].label[0],
                   (cx - 6, cy + 6), cv.FONT_HERSHEY_SIMPLEX, 0.6, (0, 255, 0),
                   2, cv.LINE_AA)  # Left or Right Hand

    return image


def draw_bounding_rect(use_brect, image, brect):
    if use_brect:
        cv.rectangle(image, (brect[0], brect[1]), (brect[2], brect[3]),
                     (0, 255, 0), 2)

    return image


if __name__ == '__main__':
    main()
<mp_hand_perf.py>
Now run the code.
root@raspberrypi:/usr/local/src/example# python3 mp_hand_perf.py
WARNING: Logging before InitGoogleLogging() is written to STDERR
W20210612 17:30:33.679704 23483 tflite_model_loader.cc:32] Trying to resolve path manually as GetResourceContents failed: ; Can't find file: mediapipe/modules/palm_detection/palm_detection.tflite
INFO: Created TensorFlow Lite XNNPACK delegate for CPU.
W20210612 17:30:33.711549 23483 tflite_model_loader.cc:32] Trying to resolve path manually as GetResourceContents failed: ; Can't find file: mediapipe/modules/hand_landmark/hand_landmark.tflite
If successful, you can see the screen like this.

It is recording a similar level of FPS to the face mesh example. Personally, I see 10 FPS as the boundary of the usable level. It's a bit disappointing at this value, but I think it's usable. However, if multiple models are used together, the FPS value will drop a lot. For example, if Face Mesg, Hand detection, and Pose Estimation are all used, the FPS value will drop well below 10.
Under the hood
If you don't like warning messages.
W20210612 12:13:16.508558  2235 tflite_model_loader.cc:32] Trying to resolve path manually as GetResourceContents failed: ; Can't find file: mediapipe/modules/face_detection/face_detection_front.tflite
INFO: Created TensorFlow Lite XNNPACK delegate for CPU.
W20210612 12:13:16.515974  2234 tflite_model_loader.cc:32] Trying to resolve path manually as GetResourceContents failed: ; Can't find file: mediapipe/modules/face_landmark/face_landmark.tflitef
Add these codes at the beginning of the source code.
import os
os.chdir("/usr/local/src/mediapipe") #directory where the mediapipe is located
Raspberry Pi OS 32bit Vs.64bit
In this article, I used Raspberry Pi OS 64-bit. Raspberry Pi OS 64-bit BullsEye is currently available for download from the Raspberry Pi Foundation site, and officially provided by tools such as Raspberry Pi Imager.
In general, when using a CPU that supports 64-bit, it is advantageous in terms of performance to use a 64-bit OS. The following performance comparison of 32-bit and 64-bit OS is taken from https://qiita.com/terryky/items/243000fcfcb89af11510.
Performance comparison was targeted for Raspberry Pi OS 32bit, 64bit and Jetson Nano (Ubuntu 18.04).
First, a performance comparison provided by https://github.com/kdlucas/byte-unixbench.
W$ git clone https://github.com/kdlucas/byte-unixbench
$ cd byte-unixbench/UnixBench
$ ./Run

Just changing the OS from 32-bit to 64-bit seems to improve integer arithmetic performance by 1.5 times. There is no change for floating point arithmetic.
If you look at the CPU computational performance alone, Raspai 4 is a little faster than Jetson Nano.
To compare the following GPU performance, we use glmark2 to measure OpenGLES drawing performance.
$ git clone https://github.com/glmark2/glmark2.git
$ cd glmark2
$ ./waf configure --with-flavors=x11-glesv2
$ ./waf
$ sudo ./waf install
$ glmark2-es2

Rendering performance seems to improve by 1.25 times when Raspai OS is updated to 64-bit. Meanwhile, the Jetson Nano is also 10x. As expected, it feels overwhelming power like a board made by a GPU vendor.
Finally, a performance comparison of MediaPipe Facemesh.

As can be seen from the above results, using a 64-bit OS on the Raspberry Pi can bring some performance improvement compared to using a 32-bit OS in most cases.
You can download the source codes at my github.
I will continue to write about MediaPipe on topics such as MediaPipe installation on Jetson series.