JetPack 4.6 was released on August 4th 2021. The simple features of Jetpack 4.6 are:
- L4T version: 32.6.1
- Support for Jetson AGX Xavier Industrial module.
- Support for new 20W mode on Jetson Xavier NX enabling better video encode and video decode performance and higher memory bandwidth. The included 10W and 15W nvpmodel configurations will perform exactly as did the 10W and 20W modes with previous JetPack releases. Any custom nvpmodel created with a previous release will require regeneration for use with JetPack 4.6. Please read L4T 32.6.1 release notes for details.
- Image based Over-The-Air update tools for developing end-to-end OTA solution for Jetson products in the field. Supported on Jetson TX2 series, Jetson Xavier NX and Jetson AGX Xavier series.
- A/B Root File System redundancy to flash, maintain and update redundant root file systems. Enhances fault tolerance during OTA by falling back to the working root file system slot in case of a failure. Supported on Jetson TX2 series, Jetson Xavier NX and Jetson AGX Xavier series.
- A new flashing tool to flash internal or external media connected to Jetson1. Supports Jetson TX2 series, Jetson Xavier NX and Jetson AGX Xavier. The new tool uses initial RAM disk for flashing and is up to1.5x faster when flashing compared to the previous method2.
- Secure boot is enhanced3 for Jetson TX2 series to extend encryption support to kernel, kernel-dtb and initrd.
- Disk encryption of external media4 supported to protect data at rest for Jetson AGX Xavier series, Jetson Xavier NX and Jetson TX2.
- NVMe driver added to CBoot for Jetson Xavier NX and Jetson AGX Xavier series. Enables loading kernel, kernel-dtb and initrd from the root file system on NVMe.
- Enhanced Jetson-IO tools to configure the camera header interface and dynamically add support for a camera using device tree overlays.
- Support for configuring for Raspberry-PI cameras line IMX219 or High Def IMX477 at run time using Jetson-IO tool on Jetson Nano 2GB, Jetson Nano and Jetson Xavier NX developer kits.
Today I will install JetPack 4.6 the way I prefer. My preferred installation method is to connect the Jetson Nano to a PC with a USB cable. It uses some kind of serial communication.
This is the easiest way to do initial setup without having to connect a monitor, keyboard, and mouse to the Jetson Nano.
Installation process
First, burn the image to the SD card.
SD Card Burning
SD card should be at least 32GB. Personally, I recommend 64GB. To test Edge AI on Jetson Nano, you need to install packages such as OpenCV, Tensorflow, and Pytorch. In addition, there is not enough space with a 16GB SD card because it has to store various AI models, images, and videos.
- Download the JetPack 4.6 image from https://developer.nvidia.com/embedded/jetpack.
- Burn the downloaded image file to the SD card using a program such as Etcher. Etcher can be used immediately without unpacking the downloaded Jetpack 4.6 zip file.
Connect the Jetson Nano and Host Computer with USB cable
Now it's time to connect the PC and Jetson Nano.
- Insert the flashed sd card into the Jetson Nano.
- Connect an Ethernet cable with Internet access to the Jetson Nano.
- Connect the Jetson Nano and Windows PC(WIndows OS is OK) with USB cable(which data transfer possible).

- Power on the Jetson Nano, then wait for Windows to recognize Nano.
- Start a Windows DeviceManagerl and check the COM port of Jetson Nano.

Initial setup screens
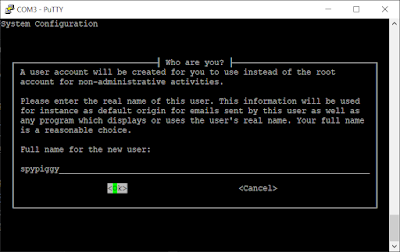
- Run putty and open the serial port. In my case "COM3".

- If successful, you can see the console screen of Jetson Nano. See the images below.
- Next, follow the instructions on the screen like this.


Wrapping up
If you need useful settings for images after initial installation, refer to the next page. It explains useful tools and basic setup methods for Jetson series.
댓글 없음:
댓글 쓰기