face_recognition package
The face_recognition package is a Python package made by Adam Geitgey that makes it easy to do face recognition, face identification, and more. It is popular in computer vision with Python because it is very easy to use and works without a machine learning framework. Built using dlib’s state-of-the-art face recognition built with deep learning. The model has an accuracy of 99.38% on the Labeled Faces in the Wild benchmark. (believe it or not)You can get the source code at https://github.com/ageitgey/face_recognition and easily implement the following functions with python.
Find faces in pictures
Find all the faces that appear in a picture:
Find and manipulate facial features in pictures
Get the locations and outlines of each person's eyes, nose, mouth and chin.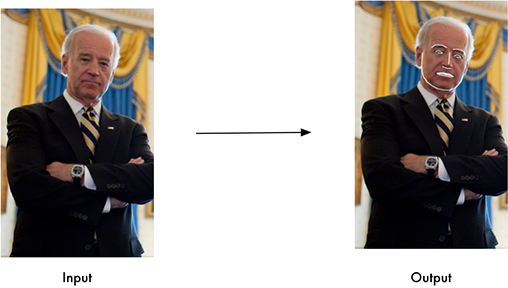
Finding facial features is super useful for lots of important stuff. But you can also use it for really stupid stuff like applying digital make-up

Identify faces in pictures
Recognize who appears in each photo.
You can even use this library with other Python libraries to do real-time face recognition:

dlib
The face_recognition package was built using dlib’s state-of-the-art face recognitionbuilt with deep learning. Therefore, knowing about dlib also helps.
Wikipedia says like this.
Dlib is a general purpose cross-platform software library written in the programming language C++. Its design is heavily influenced by ideas from design by contract and component-based software engineering. Thus it is, first and foremost, a set of independent software components. It is open-source software released under a Boost Software License.
Since development began in 2002, Dlib has grown to include a wide variety of tools. As of 2016, it contains software components for dealing with networking, threads, graphical user interfaces, data structures, linear algebra, machine learning, image processing, data mining, XML and text parsing, numerical optimization, Bayesian networks, and many other tasks. In recent years, much of the development has been focused on creating a broad set of statistical machine learning tools and in 2009 Dlib was published in the Journal of Machine Learning Research.[2] Since then it has been used in a wide range of domains.
Even though dlib is written in C++, it also supports python perfectly. The face_recognition package uses dlib's image processing, maching learning functionality heavily.
Installing dlib
If you use x64 server , you don't have to install dlib independtly, because during the face_recognition package installation, it checks whether the dlib is installed. And if not installed, it automatically installs dlib. If there's CUDA on your computer, dlib installation automatically set to use the CUDA.But Jetson Nano's CUDA has a bug. Some dlib source code needs to be modified to avoid this bug. But it's very simple.
Adam Geitgey's blog, he kindly explain how to install face_recognition on the Jetson Nano to avoid this bug.
Be careful : You don't have to build dlib if your platform is not Jetson Nano. Just skip to the "installing face_recognition".
Prerequisites
First increase swap file size. You can find about this at my article.1 2 3 4 | cd /usr/local/src git clone https://github.com/JetsonHacksNano/installSwapfile cd installSwapfile ./installSwapfile.sh |
Then reboot the system for swap changes to take effect. After rebooting, install these packages.
apt-get update -y
apt-get upgrade -y

apt-get install -y build-essential \
    cmake \
    gfortran \
    git \
    wget \
    curl \
    graphicsmagick \
    libgraphicsmagick1-dev \
    libatlas-base-dev \
    libavcodec-dev \
    libavformat-dev \
    libboost-all-dev \
    libgtk2.0-dev \
    libjpeg-dev \
    liblapack-dev \
    libswscale-dev \
    pkg-config \
    python3-pip \
    python3-dev \
    python3-numpy \
    python3-setuptools \
    zip
download dlib source and modify the code
There's a cudnn related bugs in cudnn version under 7.6.1. Because of this, you need to build the source code with a few modifications.cd /usr/local/src
wget http://dlib.net/files/dlib-19.18.tar.bz2
tar jxvf dlib-19.18.tar.bz2
cd dlib-19.18
Modify the dlib/cuda/cudnn_dlibapi.cpp file.
Find this line.
forward_algo = forward_best_algo
And make a comment like this.
//forward_algo = forward_best_algo
Tips: If your cudnn version is equal or higher than 7.6.1, you don't need to modify the above code. Check this NVidia forum talks.
Check the cudnn version like this.
spypiggy@spypiggy-desktop:~$ cat /usr/include/cudnn.h|grep CUDNN_MAJOR
#define CUDNN_MAJOR 7
#define CUDNN_VERSION (CUDNN_MAJOR * 1000 + CUDNN_MINOR * 100 + CUDNN_PATCHLEVEL)
spypiggy@spypiggy-desktop:~$ cat /usr/include/cudnn.h|grep CUDNN_MINOR
#define CUDNN_MINOR 5
#define CUDNN_VERSION (CUDNN_MAJOR * 1000 + CUDNN_MINOR * 100 + CUDNN_PATCHLEVEL)
spypiggy@spypiggy-desktop:~$ cat /usr/include/cudnn.h|grep CUDNN_PATCHLEVEL
#define CUDNN_PATCHLEVEL 0
#define CUDNN_VERSION (CUDNN_MAJOR * 1000 + CUDNN_MINOR * 100 + CUDNN_PATCHLEVEL)
My cudnn version is 7.5.0. So I should do the above job.
build dlib
This may take some time, take a coffee break.mkdir build cd build cmake .. cd .. python3 setup.py install
installing face_recognition
If you have built the dlib successfully, it's time to install face_recognition.pip3 install face_recognition
Under the hood
Brad Traversy made an excellent sample codes about face_recognition. He also released a video on YouTube explaining the source code.Download sample code
cd /usr/local/src
git clone https://github.com/bradtraversy/face_recognition_examples.git
The directory is like this.
There are some python codes made by Brad Traversy. And I added facematch2.py, findfaces2.py.
Under the img directory, there are groups, known, unknown sub directories which contains many image files.

find face
I made some modifications to the original file to make it easier to use. The source code is very simple. It opens an image file and find human faces in the image. Then it draws rectangles on all faces.import argparse import time from PIL import Image, ImageDraw import face_recognition s_time = time.time() parser = argparse.ArgumentParser(description='face match run') parser.add_argument('--image', type=str, default='./img/groups/team2.jpg') args = parser.parse_args() image = face_recognition.load_image_file(args.image) face_locations = face_recognition.face_locations(image) pil_image = Image.fromarray(image) img = ImageDraw.Draw(pil_image) # Array of coords of each face # print(face_locations) for face_location in face_locations: top, right, bottom, left = face_location img.rectangle([(left, top),(right, bottom)], fill=None, outline='green') print(f'There are {len(face_locations)} people in this image') pil_image.save('findface_result.jpg') e_time = time.time() elapsed = e_time - s_time print('Elapsed Time:%f seconds'%(elapsed))
Let's run the code.
root@spypiggy-desktop:/usr/local/src/study/face_recognition_examples# python3 findfaces2.py
There are 11 people in this image
Elapsed Time:0.574935 seconds
The resulting image is saved with the name "findface_result.jpg". There are 11 rectangles on the image.

face match
This is a more interesting example. it provides a known image and determine if the newly provided image is a match.import argparse import time import face_recognition parser = argparse.ArgumentParser(description='face match run') parser.add_argument('--known', type=str, default='./img/known/Bill Gates.jpg') parser.add_argument('--unknown', type=str, default='./img/unknown/bill-gates-4.jpg') args = parser.parse_args() s_time = time.perf_counter() image_of_known = face_recognition.load_image_file(args.known) known_face_encoding = face_recognition.face_encodings(image_of_known)[0] unknown_image = face_recognition.load_image_file(args.unknown) unknown_face_encoding = face_recognition.face_encodings(unknown_image)[0] # Compare faces results = face_recognition.compare_faces([known_face_encoding], unknown_face_encoding, tolerance=0.7) e_time = time.perf_counter() if results[0]: print('[%s] [%s] are the same person'%(args.known, args.unknown)) else: print('[%s] [%s] are NOT the same person'%(args.known, args.unknown)) print('Elapsed Time:%5.2f seconds'%(e_time - s_time))
Let's run the code.
root@spypiggy-desktop:/usr/local/src/study/face_recognition_examples# python3 facematch2.py
[./img/known/Bill Gates.jpg] [./img/unknown/bill-gates-4.jpg] are the same person
Elapsed Time:10.78 seconds
The input known image is "Bill Gates.jpg" and the testing image is "bill-gates-4.jpg". The program says that the figures in the two images are the same person. Yes, they are the same person as you see.

Now test with other person's image. Use --unknown parameter to change the unknown image.
root@spypiggy-desktop:/usr/local/src/study/face_recognition_examples# python3 facematch2.py --unknown=./img/unknown/d-trump.jpg
[./img/known/Bill Gates.jpg] [./img/unknown/d-trump.jpg] are NOT the same person
Elapsed Time: 4.57 seconds
The program says that the figures in the two images are not the same person. Yes, they are not the same person as you see.

identify faces in the picture
This time, we present some person images and then find them in another image.import argparse import time import face_recognition from PIL import Image, ImageDraw parser = argparse.ArgumentParser(description='face match run') parser.add_argument('--group', type=str, default='./img/groups/bill-steve-elon.jpg') args = parser.parse_args() image_of_bill = face_recognition.load_image_file('./img/known/Bill Gates.jpg') bill_face_encoding = face_recognition.face_encodings(image_of_bill)[0] image_of_steve = face_recognition.load_image_file('./img/known/Steve Jobs.jpg') steve_face_encoding = face_recognition.face_encodings(image_of_steve)[0] image_of_elon = face_recognition.load_image_file('./img/known/Elon Musk.jpg') elon_face_encoding = face_recognition.face_encodings(image_of_elon)[0] # Create arrays of encodings and names known_face_encodings = [ bill_face_encoding, steve_face_encoding, elon_face_encoding ] known_face_names = [ "Bill Gates", "Steve Jobs", "Elon Musk" ] # Load test image to find faces in test_image = face_recognition.load_image_file(args.group) # Find faces in test image face_locations = face_recognition.face_locations(test_image) face_encodings = face_recognition.face_encodings(test_image, face_locations) # Convert to PIL format pil_image = Image.fromarray(test_image) # Create a ImageDraw instance draw = ImageDraw.Draw(pil_image) # Loop through faces in test image for(top, right, bottom, left), face_encoding in zip(face_locations, face_encodings): matches = face_recognition.compare_faces(known_face_encodings, face_encoding) name = "Unknown Person" # If match if True in matches: first_match_index = matches.index(True) name = known_face_names[first_match_index] # Draw box draw.rectangle(((left, top), (right, bottom)), outline=(255,255,0)) # Draw label text_width, text_height = draw.textsize(name) draw.rectangle(((left,bottom - text_height - 10), (right, bottom)), fill=(255,255,0), outline=(255,255,0)) draw.text((left + 6, bottom - text_height - 5), name, fill=(0,0,0)) del draw # Display image pil_image.show() # Save image pil_image.save('identify.jpg')
We will present three photos of Bill Gates, Steve Jobs and Elon Musk and find them in the new photos.
Let's run the code.
root@spypiggy-desktop:/usr/local/src/study/face_recognition_examples# python3 identify2.py
The program finds 3 person exactly.

Now test with other image with --group parameter. Let's run the code.
root@spypiggy-desktop:/usr/local/src/study/face_recognition_examples# python3 identify2.py --group=./img/groups/bill-steve-elon-keanu.jpg
The program finds 3 person, and Keanu Reeves is marked "Unknown Person".

Use webcam to identifying faces
This sample code requires opencv. If you don't installed opencv. Please visit my other blog(https://spyjetson.blogspot.com/2019/09/jetsonnano-opencv-411-build.html) to install opencv 4.1 on the Jetson Nano.I modified the Adam Geitgey's code at github(https://github.com/ageitgey/face_recognition/blob/master/examples/facerec_from_webcam.py) to display the FPS and adjust the video resolution. Jetson Nano has CUDA, but it's a lot less powerful than desktop PCs, so it's a good idea to lower the video resolution whenever possible. First check the resolution your webcam supports. The video resolution can be checked in the following ways.
spypiggy@spypiggy-desktop:~$ ls /dev/video*
/dev/video0
spypiggy@spypiggy-desktop:~$ v4l2-ctl -d /dev/video0 --list-formats-ext
ioctl: VIDIOC_ENUM_FMT
        Index       : 0
        Type        : Video Capture
        Pixel Format: 'YUYV'
        Name        : YUYV 4:2:2
                Size: Discrete 640x480
                        Interval: Discrete 0.033s (30.000 fps)
                        Interval: Discrete 0.040s (25.000 fps)
                        Interval: Discrete 0.050s (20.000 fps)
                        Interval: Discrete 0.067s (15.000 fps)
                        Interval: Discrete 0.100s (10.000 fps)
                        Interval: Discrete 0.200s (5.000 fps)
                Size: Discrete 160x120
                        Interval: Discrete 0.033s (30.000 fps)
                        Interval: Discrete 0.040s (25.000 fps)
                        Interval: Discrete 0.050s (20.000 fps)
                        Interval: Discrete 0.067s (15.000 fps)
                        Interval: Discrete 0.100s (10.000 fps)
                        Interval: Discrete 0.200s (5.000 fps)

                        ......
                        ......
                        ......
If v4l2-ctl is not installed on your Jetson Nano, you can install it with the apt command.
import time
import face_recognition
import cv2
import numpy as np
# original from : https://github.com/ageitgey/face_recognition/blob/master/examples/facerec_from_webcam.py
# This is a super simple (but slow) example of running face recognition on live video from your webcam.
# There's a second example that's a little more complicated but runs faster.
# PLEASE NOTE: This example requires OpenCV (the `cv2` library) to be installed only to read from your webcam.
# OpenCV is *not* required to use the face_recognition library.
# Get a reference to webcam #0 (the default one)

cap = cv2.VideoCapture(0)

# low resolution helps Jetson Nano's poor performance
cap.set(cv2.CAP_PROP_FRAME_WIDTH, 640)
cap.set(cv2.CAP_PROP_FRAME_HEIGHT, 480)

# cap.set(cv2.CAP_PROP_FRAME_WIDTH, 432)
# cap.set(cv2.CAP_PROP_FRAME_HEIGHT, 240)

# Load a sample picture and learn how to recognize it.
my_image = face_recognition.load_image_file("./img/known/spypiggy.jpg")
my_face_encoding = face_recognition.face_encodings(my_image)[0]

# Create arrays of known face encodings and their names
known_face_encodings = [
    my_face_encoding
]
known_face_names = [
    "spypiggy"
]
fps_time = 0
count = 0
while cap.isOpened() and count < 50:
    # Grab a single frame of video
    ret, frame = cap.read()
    if ret == False:
        print("Camera read Error")
        break
    # Convert the image from BGR color (which OpenCV uses) to RGB color (which face_recognition uses)
    rgb_frame = cv2.cvtColor(frame, cv2.COLOR_BGR2RGB)

    # Find all the faces and face enqcodings in the frame of video
    face_locations = face_recognition.face_locations(rgb_frame)
    face_encodings = face_recognition.face_encodings(rgb_frame, face_locations)

    # Loop through each face in this frame of video
    for (top, right, bottom, left), face_encoding in zip(face_locations, face_encodings):
        # See if the face is a match for the known face(s)
        matches = face_recognition.compare_faces(known_face_encodings, face_encoding)

        name = "Unknown"

        # If a match was found in known_face_encodings, just use the first one.
        # if True in matches:
        #     first_match_index = matches.index(True)
        #     name = known_face_names[first_match_index]

        # Or instead, use the known face with the smallest distance to the new face
        face_distances = face_recognition.face_distance(known_face_encodings, face_encoding)
        best_match_index = np.argmin(face_distances)
        if matches[best_match_index]:
            name = known_face_names[best_match_index]

        # Draw a box around the face
        cv2.rectangle(frame, (left, top), (right, bottom), (0, 0, 255), 2)

        # Draw a label with a name below the face
        cv2.rectangle(frame, (left, bottom - 35), (right, bottom), (0, 0, 255), cv2.FILLED)
        font = cv2.FONT_HERSHEY_DUPLEX
        cv2.putText(frame, name, (left + 6, bottom - 6), font, 1.0, (255, 255, 255), 1)

    # Display the resulting image
    fps = 1.0 / (time.time() - fps_time)
    fps_time = time.time()
    cv2.putText(frame , "FPS: %f" % (fps), (20, 40),  cv2.FONT_HERSHEY_SIMPLEX, 1, (0, 255, 0), 2)
    cv2.imshow('Video', frame)
    count += 1

    # Hit 'q' on the keyboard to quit!
    if cv2.waitKey(1) & 0xFF == ord('q'):
        break

# Release handle to the webcam
cap.release()
cv2.destroyAllWindows()
For known image, I was forced to use my photo. Of course, for testing you should use your photo instead.
Let's run the code.
root@spypiggy-desktop:/usr/local/src/study/face_recognition_examples# python3 webcam_identify.py

Looking straight ahead, the program distinguished me exactly.But when I turned my head sideways, the program didn't distinguish me.

I used only my face in the program, but it's easy to modify the program to use multiple faces. Modify it to suit your purpose.
At VGA resolution(640X480), I can achieve approximately 1 FPS for a single face identifying.
If you want to identify multiple persons, the FPS value will be even lower.
Wrapping up
The face_recognition package is very easy to use. Even though you are not familiar with the Machine Learning frameworks like Tensorflow, Pytorch, you can easily make a program that detects human face, identifying the person using the face_recognition package.The face_recognition depends on dlib package. So if the dlib package's performance improves, the face_recognition's performance will be automatically improves. So always keep an eye on the version of these packages.
In future versions, the NVIDIA Jetson's CUDA bug will be fixed. Until then, build dlib the above way.
댓글 없음:
댓글 쓰기