2020년 6월 28일 일요일

Jetson Nano - YoloV4 Installation

Today we will look at how to implement YOLOv4 on Jetson.  The following description of YOLO was taken from https://medium.com/@thundo/yolov4-on-jetson-nano-672c1d38aed2.


In 2014 Joseph Redmon started working on , a real-time object detector model. He created a C++/CUDA implementation that remained “official” for a few years. A couple months back he stopped working on the project altogether over privacy concerns.


Over time several forks have spawned, with gaining the spotlight. The fork, daily maintained, added several features (Windows support, half-precision, additional layers, etc) and gathered a rich list of models and variants. Thanks to constant attention and improvements, Darknet/YOLO remains one of the benchmarks for its problem category.
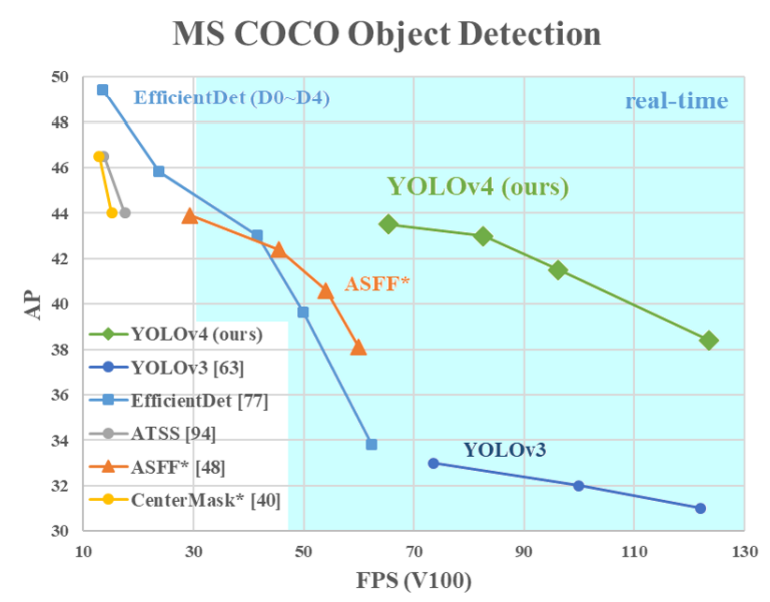
At the end of April 2020, Alexey and his team released the next iteration of Yolo, which improves both AP and FPS of YOLOv3 by about 10%.


Comparison between YOLOv4 and other detectors

With the system configuration behind us, we can now work on YOLO. Luckily for us, the Nvidia image ships with CUDA 10 and OpenCV 4.1.1 already installed: this saves us at least 1h of compilation time and plenty of headaches…


As explained above, you need OpenCV, Cuda, etc. software to build YOLOv4. All of these software are already installed in JetPack 4.4 that we will use.
For information on installing JetPack 4.4, see https://spyjetson.blogspot.com/2020/06/jetson-nano-jetpack-44-dp-and-pytorch.html. I also recommend installing PyTorch and Torchvision as described in the link blog. I will use it in the next blog.


Build YOLOv4

The YOLOv4 site we will be using at https://github.com/AlexeyAB/darknet#how-to-use-on-the-command-line explains two ways to install YOLOv4 on a Linux system.

The first method is to use CMake. To use this method, you must upgrade the version of CMake installed in JetPack 4.4. CMake 3.12 or higher is required to install YOLOv4, but JetPack 4.4 provides version 3.10.2 of CMake.
And the next method is to compile the source code immediately after modifying the Makefile.
We will use the second method.

Prerequisites

This article assumes that Jetson Nano uses JetPack 4.4 DP or higher and PyTorch 1.5.0 or higher and torchvision 0.6.0 or higher. Installation instructions are explained at https://spyjetson.blogspot.com/2020/06/jetson-nano-jetpack-44-dp-and-pytorch.html.

In order to compile CUDA-related sources, the CUDA path must be added to the environment variable.
First, do the following:

sudo apt update
sudo apt upgrade
sudo apt install -y git wget build-essential gcc g++ make binutils libcanberra-gtk-module
cd /usr/local/src
echo "export PATH=/usr/local/cuda/bin${PATH:+:${PATH}}" >> ~/.bashrc
echo "export LD_LIBRARY_PATH=/usr/local/cuda/lib64${LD_LIBRARY_PATH:+:${LD_LIBRARY_PATH}}" >> ~/.bashrc
source ~/.bashrc


Download the YOLOv4 codes and build them

Now, after downloading the source code from gitgub, we will compile.
First, download the codes.

git clone https://github.com/AlexeyAB/darknet.git
cd darknet

Next, modify the Makefile as follows. We will use Jetson Nano's GPU, so enable GPU options. We also use Cuda and OpenCV, so enable the CUDNN and OPENCV options. OPENMP improves execution speed through parallel processing in a multi-CPU environment, so enable this option too. LIBSO option builds libdarknet.so file that is necessary for python programming, so enable it too. Last thing you must do is changing the ARCH parameter that defines CPU architecture.

GPU=1
CUDNN=1make -j4
OPENCV=1
OPENMP=1
LIBSO=1
...
ARCH= -gencode arch=compute_53,code=[sm_53,compute_53]
...

Before building the source code, you need to install the library to use openmp.

apt-get install libomp-dev

Now build the source code. This process does not take long. It will be over in a few minutes.


make -j4


If the build completed successfully, you will see the following files.

root@jetpack-4:/usr/local/src/darknet# ls -al
total 257404
drwxr-xr-x 17 root root      4096  6월 28 00:06 .
drwxr-xr-x 13 root root      4096  6월 27 22:32 ..
drwxr-xr-x  4 root root      4096  6월 27 22:29 3rdparty
drwxr-xr-x  2 root root      4096  6월 27 23:30 backup
-rw-r--r--  1 root root        96  6월 27 23:50 bad.list
drwxr-xr-x  3 root root      4096  6월 27 22:29 build
-rwxr-xr-x  1 root root      8285  6월 27 22:29 build.ps1
drwxr-xr-x  3 root root      4096  6월 27 23:14 build_release
-rwxr-xr-x  1 root root      2044  6월 27 22:29 build.sh
drwxr-xr-x  3 root root      4096  6월 27 22:29 cfg
drwxr-xr-x  2 root root      4096  6월 27 22:29 .circleci
drwxr-xr-x  3 root root      4096  6월 27 22:29 cmake
-rw-r--r--  1 root root     20573  6월 27 22:29 CMakeLists.txt
-rwxr-xr-x  1 root root   2363032  6월 28 00:04 darknet
-rw-r--r--  1 root root      1363  6월 27 22:29 DarknetConfig.cmake.in
-rw-r--r--  1 root root     20083  6월 28 00:06 darknet.py
-rw-r--r--  1 root root      4010  6월 27 22:29 darknet_video.py
drwxr-xr-x  3 root root      4096  6월 27 22:29 data
drwxr-xr-x  8 root root      4096  6월 27 22:29 .git
drwxr-xr-x  4 root root      4096  6월 27 22:29 .github
-rw-r--r--  1 root root       581  6월 27 22:29 .gitignore
-rwxr-xr-x  1 root root       108  6월 27 22:29 image_yolov2.sh
-rwxr-xr-x  1 root root       110  6월 27 22:29 image_yolov3.sh
drwxr-xr-x  2 root root      4096  6월 27 22:29 include
-rwxr-xr-x  1 root root       345  6월 27 22:29 json_mjpeg_streams.sh
-rwxr-xr-x  1 root root   2608480  6월 28 00:04 libdarknet.so
-rw-r--r--  1 root root       515  6월 27 22:29 LICENSE
-rw-r--r--  1 root root      5480  6월 28 00:01 Makefile
-rwxr-xr-x  1 root root       159  6월 27 22:29 net_cam_v3.sh
drwxr-xr-x  2 root root      4096  6월 28 00:04 obj
-rw-r--r--  1 root root    494694  6월 27 23:51 predictions.jpg
-rw-r--r--  1 root root     59377  6월 27 22:29 README.md
drwxr-xr-x  2 root root      4096  6월 27 22:29 results
drwxr-xr-x  4 root root      4096  6월 27 22:29 scripts
drwxr-xr-x  2 root root      4096  6월 27 23:14 src
-rw-r--r--  1 root root     10549  6월 27 22:29 .travis.yml
-rwxr-xr-x  1 root root    134336  6월 28 00:05 uselib
-rwxr-xr-x  1 root root       108  6월 27 22:29 video_v2.sh
-rwxr-xr-x  1 root root       108  6월 27 22:29 video_yolov3.sh

Now download the pretrained model.

mkdir weights
cd weights
wget https://github.com/AlexeyAB/darknet/releases/download/darknet_yolo_v3_optimal/yolov4.weights
wget https://github.com/AlexeyAB/darknet/releases/download/darknet_yolo_v4_pre/yolov4-tiny.weights
## YoloV3 Models
wget https://pjreddie.com/media/files/yolov3.weights
wget https://pjreddie.com/media/files/yolov3-tiny.weights

And the yolov3-tiny-prn.weights file can be downloaded from https://drive.google.com/file/d/18yYZWyKbo4XSDVyztmsEcF9B_6bxrhUY/view?usp=sharing.

Test

If the build is successful, a darknet executable is created.
You can simply test it using this file.

root@jetpack-4:/usr/local/src/darknet# ./darknet detector test cfg/coco.data cfg/yolov4.cfg weights/yolov4.weights
 CUDA-version: 10020 (10020), cuDNN: 8.0.0, GPU count: 1
 OpenCV version: 4.1.1
 0 : compute_capability = 530, cudnn_half = 0, GPU: NVIDIA Tegra X1
net.optimized_memory = 0
mini_batch = 1, batch = 8, time_steps = 1, train = 0
   layer   filters  size/strd(dil)      input                output
   0 conv     32       3 x 3/ 1    608 x 608 x   3 ->  608 x 608 x  32 0.639 BF
   1 conv     64       3 x 3/ 2    608 x 608 x  32 ->  304 x 304 x  64 3.407 BF
   2 conv     64       1 x 1/ 1    304 x 304 x  64 ->  304 x 304 x  64 0.757 BF
   3 route  1                                      ->  304 x 304 x  64
   4 conv     64       1 x 1/ 1    304 x 304 x  64 ->  304 x 304 x  64 0.757 BF
   5 conv     32       1 x 1/ 1    304 x 304 x  64 ->  304 x 304 x  32 0.379 BF
   6 conv     64       3 x 3/ 1    304 x 304 x  32 ->  304 x 304 x  64 3.407 BF
   7 Shortcut Layer: 4,  wt = 0, wn = 0, outputs: 304 x 304 x  64 0.006 BF
   8 conv     64       1 x 1/ 1    304 x 304 x  64 ->  304 x 304 x  64 0.757 BF
   9 route  8 2                                    ->  304 x 304 x 128
   ....
   ....   
   ....   
   
[yolo] params: iou loss: ciou (4), iou_norm: 0.07, cls_norm: 1.00, scale_x_y: 1.05
nms_kind: greedynms (1), beta = 0.600000
Total BFLOPS 128.459
avg_outputs = 1068395
 Allocate additional workspace_size = 106.46 MB
Loading weights from weights/yolov4.weights...
 seen 64, trained: 32032 K-images (500 Kilo-batches_64)
Done! Loaded 162 layers from weights-file
Enter Image Path:

The darknet laods model first, so it takes some time. After loading the model, it asks you to input the image path.

Enter Image Path: /usr/local/src/test_images/peds_0.jpg
/usr/local/src/test_images/peds_0.jpg: Predicted in 3610.394000 milli-seconds.
person: 100%
person: 100%
person: 99%
tie: 74%
car: 97%
person: 99%
car: 99%
backpack: 90%
car: 99%
car: 75%
Enter Image Path:

darknet found 4 people, 4 cars, 1 backpack and 1 tie. The image used in the test is as follows.

<peds_0.jpg>

You can see that Darknet found the objects exactly.

Python Test

There is an example darknet.py file for Python. This file needs some modification to load the so file correctly.

lib = CDLL(os.path.join(os.getcwd(), "libdarknet.so"), RTLD_GLOBAL)

...

def performDetect(imagePath="data/dog.jpg", thresh= 0.25, configPath = "./cfg/yolov4.cfg", weightPath = "./weights/yolov4.weights", metaPath= "./cfg/coco.dat    a", showImage= True, makeImageOnly = False, initOnly= False):

...

 def performBatchDetect(thresh= 0.25, configPath = "./cfg/yolov4.cfg", weightPath = "./weights/yolov4.weights", metaPath= "./cfg/coco.data", hier_thresh=.5, n    ms=.45, batch_size=3):

As with the darknet executable above, after loading the model, search for the image of the ./data/dog.jpg file.

root@jetpack-4:/usr/local/src/darknet# python3 darknet.py detector test
 Try to load cfg: ./cfg/yolov4.cfg, weights: ./weights/yolov4.weights, clear = 0
 0 : compute_capability = 530, cudnn_half = 0, GPU: NVIDIA Tegra X1
net.optimized_memory = 0
mini_batch = 1, batch = 8, time_steps = 1, train = 0
   layer   filters  size/strd(dil)      input                output
   0 conv     32       3 x 3/ 1    608 x 608 x   3 ->  608 x 608 x  32 0.639 BF
   1 conv     64       3 x 3/ 2    608 x 608 x  32 ->  304 x 304 x  64 3.407 BF
   2 conv     64       1 x 1/ 1    304 x 304 x  64 ->  304 x 304 x  64 0.757 BF
   3 route  1                                      ->  304 x 304 x  64
   4 conv     64       1 x 1/ 1    304 x 304 x  64 ->  304 x 304 x  64 0.757 BF
   5 conv     32       1 x 1/ 1    304 x 304 x  64 ->  304 x 304 x  32 0.379 BF
   6 conv     64       3 x 3/ 1    304 x 304 x  32 ->  304 x 304 x  64 3.407 BF
   7 Shortcut Layer: 4,  wt = 0, wn = 0, outputs: 304 x 304 x  64 0.006 BF
   8 conv     64       1 x 1/ 1    304 x 304 x  64 ->  304 x 304 x  64 0.757 BF
   9 route  8 2                                    ->  304 x 304 x 128
   ....
   ....   
   ....   
   
[yolo] params: iou loss: ciou (4), iou_norm: 0.07, cls_norm: 1.00, scale_x_y: 1.05
nms_kind: greedynms (1), beta = 0.600000
Total BFLOPS 128.459
avg_outputs = 1068395
 Allocate additional workspace_size = 106.46 MB
 Try to load weights: ./weights/yolov4.weights
Loading weights from ./weights/yolov4.weights...
 seen 64, trained: 32032 K-images (500 Kilo-batches_64)
Done! Loaded 162 layers from weights-file
Loaded - names_list: data/coco.names, classes = 80
Unable to show image: No module named 'skimage'
[('dog', 0.9787506461143494, (220.9882049560547, 383.2079772949219, 184.41786193847656, 316.509033203125)), ('bicycle', 0.9217984080314636, (343.4819641113281, 276.87603759765625, 458.06488037109375, 298.71209716796875)), ('truck', 0.9183095097541809, (574.2606201171875, 123.24830627441406, 220.67367553710938, 93.20551300048828)), ('pottedplant', 0.33072125911712646, (699.326416015625, 131.88845825195312, 36.53395080566406, 45.44673538208008))]
   

Since we haven't installed the skimage package yet, it doesn't print, but the console output shows that there is a dog, a bike, a truck, and a potted plant.

<darknet/data/dog.jpg>
In YOLO, Python programs load and use C-coded so files directly for faster processing speed.


Wrapping up

So far, we have seen how to install YOLOv4 on Jetson Nano and have tested it simply. Next time, I'll create Python code that I can use for my purposes.


댓글 없음:

댓글 쓰기